Showing posts with label Food Resolutions/Goals. Show all posts

Strawberry Season

Strawberry season is almost over here in the Piedmont of North Carolina. Last weekend I bought 7 gallons of strawberries (for $10/gallon) from the farmers market. These strawberries, along with many other local strawberries that were for sale, are pesticide free. That's fantastic since conventional strawberries are listed as one of the "dirty dozen" (fruits and vegetables most highly contaminated with pesticides).

I'm stocking the freezer so that we'll have strawberries to enjoy the rest of the year. We don't buy strawberries in December. December strawberries come from far away places and because of that, they're picked when they're pink in order to make the journey. A pink, hard strawberry is not a strawberry as far as I'm concerned. Nothing compares to the flavor of strawberries picked at the peak of the season.

I froze 5 1/2 gallons of whole strawberries. I froze them whole this year so I can use them in smoothies, baked goods, or puree them to make freezer jam later in the year.

Come January, it may be winter outside, but it will always be summer in our freezer.

The Switch To Local Milk and Garden Update

We recently started buying local milk. We are lucky enough to have a local farm that produces milk from cows who are raised humanely, fed on pasture and grains grown on the same farm, and never receive additional hormones. Homeland Creamery is in Julian, NC and I'm hoping to be able to take a trip out to the farm in the next few months. Cows who are grass-fed are healthier animals and their milk is healthier. Homeland Creamery does use some grain but I am happy that they're on pasture much of the time.


The milk is pasteurized (raw milk is illegal in NC) in such a way as to retain the creaminess of the milk. Since I can't drink milk (due to IBS), I had Jon do a taste test. I had him taste the 2% milk from the store and then the 2% from Homeland Creamery. He knew instantly which was the "new" milk because he said it tasted much creamier. He said the store bought 2% tasted like water in comparison.

There's a small store on the way to preschool that carries Homeland Creamery's milk. It is more expensive then the milk I used to buy at Walmart but only by $1.50 a gallon. That may sound like a lot but when I did the math and realized that our 10 gallons a month would only cost us an extra $15, we decided it was worth it. That's less then it would cost for us to go out to eat. I'm happy to support a local farm that raises their animals humanely, the milk tastes better, and the milk is better for my family.


They also sell homemade butter. We don't go through much butter since Jon and kids mostly just use it on toast so this pound of butter should last a long while.


The last thing I bought was a half gallon of heavy cream. The ice cream recipe I use calls for 1 cup of cream (along with 3 cups of whole milk) so I divided the rest up into freezer containers and now I have 7 cups of cream in the freezer ready for the next batch of ice cream.


I made Jon and the kids some strawberry ice cream over the weekend. Jon said it should be a crime to eat something that good. I used my go-to ice cream recipe and added about 1/2 cup of strawberry jam from last year's strawberries. It's not very often that I get sad about not being able to eat dairy, but I have to admit that I really wanted some of this ice cream.


Now for the garden update...


The seeds I planted a few weeks ago weren't as successful as I had hoped. I had less then 1/2 of my seeds germinate. I spent a few mornings this week getting the garden ready for the second round of seeding.


This lettuce is coming up pretty well. There are bare spots but I'm wondering if maybe I'll try to transplant some of my thinnings in a week or two to help fill in the bare spots.


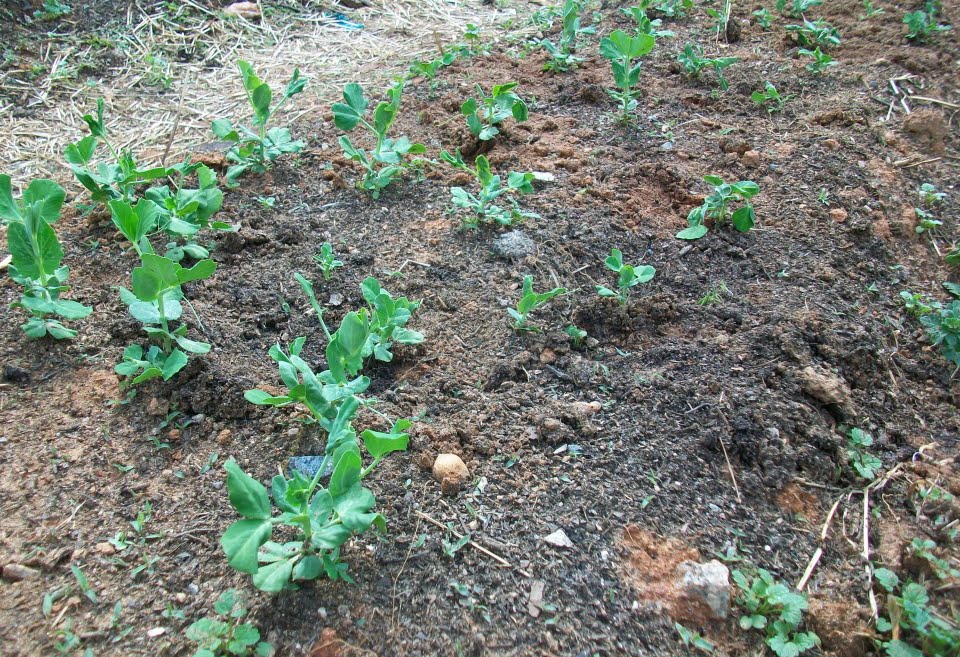
The sugar snap peas are really starting to grow. I transplanted some of the plants from the other end of the bed to make a more dense patch of peas. The transplants are doing well.


My swiss chard plant that survived the winter is doing really well. I'm going to be harvesting some to add to soup later this week.


So, after I weeded the teeny, tiny weeds that had sprouted everywhere, I put up the garden fence. We have quite a few wild rabbits in the woods behind our house and one groundhog who I assume will be making an appearance again soon. I don't want to risk having my little plants eaten.


I replanted the beds that didn't have much success the first time around. I interplanted some beds. My broccoli beds now have musclun greens and spinach planted with it. My carrot bed has now been seeded with mustard greens (I've never tried them before... that's some of the fun of a garden). I planted spinach around the edge of the kohlrabi bed. I put in lettuce seeds just about anywhere I thought they'd fit. Hopefully these seeds will germinate better and we'll have a full salad bowl in a month or so.


I'm hoping this picture will look much different next month.


This weekend I'm hoping to get back garden ready for planting. I'm going to be buying my tomato plants and putting in seeds for summer veggies soon. Now, as long as Mother Nature cooperates, we'll be eating well this summer.

I've linked this post up with Simple Lives Thursday.

A Brand Spankin' New Year

Isn't it amazing how the beginning of a new calendar can make everything seem possible? A whole year stretching ahead with nothing but possibilities. We've started off our New Year by clearing out the clutter and junk from our house. We've bagged it, boxed it, and either thrown it out or boxed it for charity. We're not done with all of the rooms but we're 75% there. It feels good to get rid of stuff that is no longer needed or wanted.
Last year I watched a movie ("Food Inc.") and read two books ("Omnivores Dilemma" and "In Defense of Food") that changed the way I think about food and changed the way my family eats (well, 95% of the time, that is). I'd like to look back at this past year and revisit the resolutions I made a year ago today.


2010 Res.#1- Buy fewer processed foods - Last year I jumped right in and tried to make everything possible from scratch. I made hamburger rolls, pretzels, crackers, ... you name it. Some things were wonderful and some things were flops. I spent a lot of time in the kitchen. Don't get me wrong, I love cooking and baking but I would like to continue to love it. By burning myself out (pun intended) by trying to make everything, I ruin the fun and love of food. Food shouldn't be a chore.
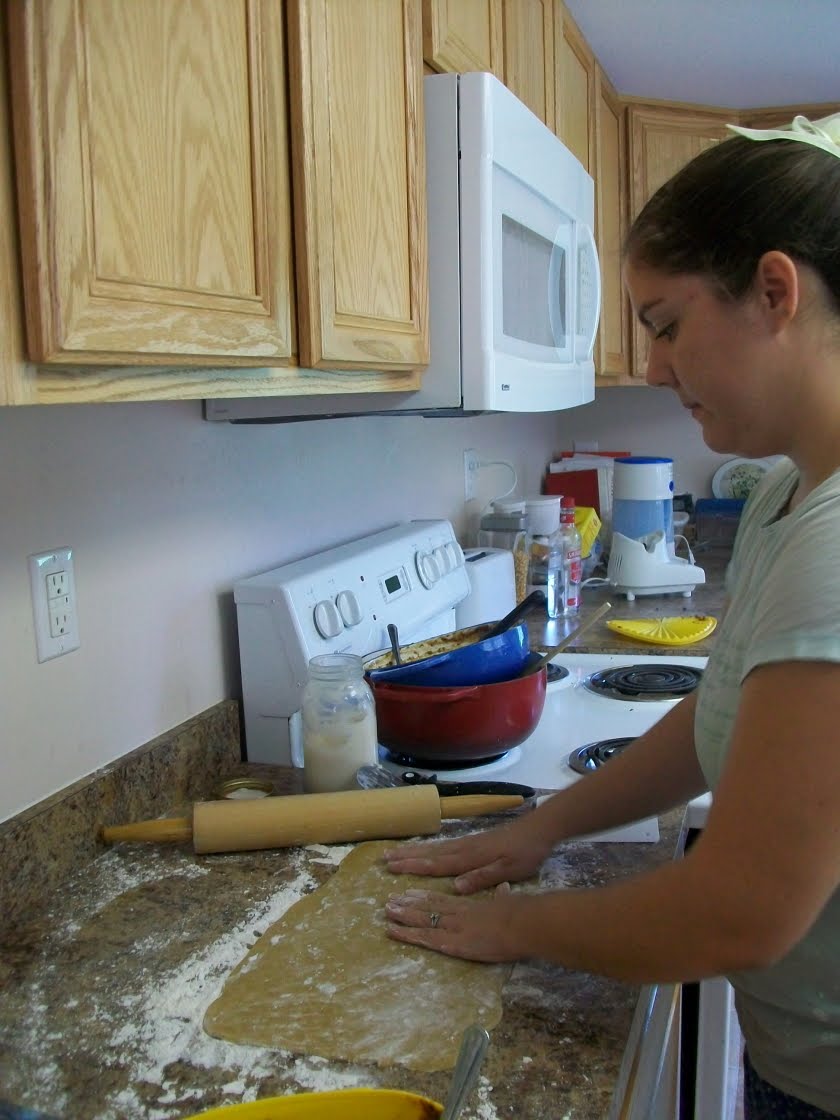
Evan learning to roll out pizza dough
Last year I started to slowly transition from making everything under the stars to making some things and buying the rest. I've found a good balance that I'm happy with. The foods I do buy are as close to whole foods as I can manage while still saving me time in the kitchen. I look at labels and find foods with fewest ingredients and ingredients I recognize as food. I make all our cookies, muffins, and treats. The snack foods I buy are crackers, pretzels, and the occasional bag of chips. I tried making those from scratch but I've been met with only mediocre success. So now I buy them and bake them when I want to... and when it makes me happy.

I've finally been successful in ridding our house of foods containing High-Fructose Corn Syrup or Partially Hydrogenated oils. I've been able to find foods from Walmart that are free of those ingredients which makes it easier to stick to our grocery budget. It was tricky finding some things that didn't contain those ingredients (Worcestershire sauce and beans... who know?) but it makes grocery shopping more fun. Okay, fun might be pushing it a bit. Still, playing "read the ingredients" can be enlightening.
2010 Res.#2- Buy local whenever possible -
I've added lots of local products to our diet this past year.... beef, pork, honey, eggs, and all kinds of fruits and veggies. I've added as many things as I can manage without stress and without breaking the bank. My sister raised chickens for me this past year so now my freezer is full of free-range chicken. My mom has a wonderful flock of backyard chickens and is VERY generous with sharing the eggs they lay.
Some things have proved too expensive (local pastured poultry and local dairy) so I do what I can and I don't stress about the rest. I still buy bacon from the store. Until I can find a good local source with bacon I can afford, I'll switch. Until then, I buy bacon and don't stress. Again, it's all about balance for me.
Homemade cinnamon rolls with local scrambled eggs and homemade applesauce from local apples


2010 Res. #3 - Get the most from my garden - Well, last year's garden started off great but soon went downhill starting with temperatures in the 90's in April! We had a hot, hot summer with either no rain or way too much. We traveled 4 of 8 weeks last summer so it made keeping up with weeds and harvests challenging to say the least. I could have spent every moment that I was home between vacations weeding, watering, and trying to save anything that would survive our unusual summer but instead I decided to let it go. Letting it go was hard because of all the planning and work that went into making last year's garden. I was sad to look out and see my meadow of weeds but it was a lost cause.
So, last year's third resolution was a flop. The good news is that there is no garden police. Thank goodness or else I would have been thrown in the slammer for neglect. I'm hoping that this year our weather will be a bit closer to average. I'm going to plan a garden around our summer traveling. I will grow a garden that provides me with enjoyment as well as food. And if all else fails, I'll be at the Farmer's Market, basket in hand.
Last year's resolutions led to the way that we eat now. I am so happy with the food that we eat. I'm happy with the balance I've found. I don't want to be fearful of food and I don't want to lose the joy of eating it.
So, this year? What do I want to resolve to do this year? Well, I'm not quite sure. I'm very happy with life at this moment. I guess if I had to pick one thing to do differently this year, I would pick.... drum roll, please..
2011 New Year's Resolution ... Eat More Vegetables
Yep, that's it. Nothing dramatic. I want to "keep on, keepin' on" the way I am right now... only with a few more veggies in my diet.
So, here's wishing you a Happy New Year full of possibilities!

Up To My Eyeballs In Apples

Ever since we went apple picking, 2 weeks ago, I've been steadily trying to turn 3 of the 6 bushels into applesauce. It takes me about an hour to peel and chop enough apples to fill my 4 quart crock pot. I have about a bushel left.

I usually freeze my applesauce in quart containers (yogurt containers) but this year my chest freezer is full of chicken (a good problem to have). I decided to can my applesauce this year. This is the first canning I've done on my own. I can vaguely remember canning with my mom as a teenager and I helped my sister can venison during my last visit. So, with my sister's advice and a wealth of online information on how to can, I got started. It's actually very easy to water-bath can. Once I had everything laid out and ready to go, it only takes a few minutes to get everything in the jars and into the canner. My kitchen has looked like this many times in the past two weeks.
I love looking at the processed jars. I've made many types of applesauce and I love looking at the different colors.

So far I've made strawberry, blueberry, cinnamon, "apple pie" (extra cinnamon, nutmeg, and a bit of sugar), and peach and cherry are in the canner right now.


Look how deep purple the blueberry applesauce is. I don't really have recipes for the fruit applesauce... it's more of a method.
When fruit was in season this spring/summer, I would buy in bulk, puree it, and freeze it in 2 cup bags. When my apples are almost done cooking in the crock pot, I put in one of the frozen chunks of fruit. Most of the time 2 cups of fruit per 3 or 4 quarts of applesauce is enough but sometimes I had more. I also add a bit of water, pinch of salt, and other spices depending on the flavor I'm making. I've added about 1/2 cup of sugar to some of my big batches of applesauce because my apples are a bit more tart this year then in years past. I don't like a very sweet applesauce though so 1/2 cup has been plenty for a 4 quart batch.
I can't wait to show you all of my jars lined up when I'm done processing them all. Now, we don't really have to open them, do we? All this work peeling, chopping, stirring, canning... just to pop open a jar and eat it so quickly... Oh well, this applesauce tastes so good that it's definitely worth it!


Homemade Chocolate Syrup

Have you ever read the ingredients on a bottle of chocolate syrup. I was not too surprised to learn that one of the first ingredients is High Fructose Corn Syrup. Months ago I stopped buying anything with HFCS after learning about how bad it is for your health. Here's is an excellent article about HFCS and how even when rats consumed the same amount of total calories, the rats that ate HFCS gained significantly more weight and body fat then the other rats that ate table sugar. Those animals that ate HFCS over an extended amount of time also had abnormally high body fat, especially in their abdomen and high triglycerides. It makes me so angry when I see commercials by the Corn Industry trying to convince us that it's like any other sweetener. For these reasons, I try to avoid it at all costs.
.
So, avoiding HFCS is one of the reasons I choose to make my own chocolate syrup. The other reasons are that it tastes SO much better then store bought and it's super easy to make. Here are the ingredients you'll need. Be sure to check your corn syrup brand to make sure it doesn't include HFCS. I found that the store brand included HFCS but Karo didn't. You need a bit of corn syrup to prevent the sugars from recrystallizing once the chocolate syrup cools.


Chocolate Syrup (original recipe found here)

1 cup cocoa powder
1 1/2 cups granulated sugar
1 cup hot water
1/8 tsp. salt
2 Tbsp. light corn syrup
1 tsp. vanilla extract

In a small sauce pan, bring the cocoa, sugar, water, salt, and corn syrup to a boil over medium heat, stirring constantly. Cook for 3 minutes.

Remove from heat and add vanilla, stirring to mix well. Let cool and then transfer to an air tight container. Keep in the refrigerator.

Makes about 1 3/4 cups of syrup.


I find that transferring the cooling syrup to a measuring cup with a spout helps to get it into my squeeze bottle that I use as a storage container without spilling. You can also wash out an existing syrup bottle and use it to store your homemade chocolate syrup.


Nothing goes better with chocolate syrup then homemade ice cream. Here's my favorite recipe for French Vanilla but I've now started using 2 cups of cream and 2 cups of milk. It makes it super creamy.
Give this recipe a try and I'll promise that you'll never reach for that bottle from the store again.

My Favorite Homemade Granola Bars

I've done it! I've finally found a granola bar recipe that I LOVE. I've found ones before that I've liked but none have been amazing. They're usually way too sweet and fall apart. This granola bar recipe has it all. It's simple, has few ingredients, they're crunchy without being hard, they hold together really well, and they're lightly sweet. I'd definitely recommend you give this one a try.

Chocolate Chip Granola Bars (Whole Foods Market.com)

4 cups quick cooking oats
1/3 cup oil
2/3 cup honey
1 tsp. vanilla
1/4 tsp. salt
1/2 cup chocolate chips (chopped)
1 cup finely chopped nuts (optional-I didn't add them this time)

Preheat the oven to 350*.

Spread oats on an ungreased baking sheet and bake for 15 minutes, stirring a couple of times. Allow oats to cool to room temperature.
Combine remaining ingredients in a large mixing bowl. Add cooled oats. Spread mixture into a 9x13 baking dish that has been sprayed with cooking spray. Press mixture firmly into the baking dish. Bake for 25-30 minutes or until edges are golden brown. Cool completely and cut into 16 bars.
See how the oats in the foreground are darker? Be sure to stir often while toasting the oats so they don't get darker then this medium brown.


I'm glad I thought to chop the chocolate chips before adding them. Because the quick oats give the bars a finer texture, I thought big chocolate chips wouldn't work. Chopping them also made sure that each bite has a bit of chocolate.

Is it strange that I find ingredients pretty?


I used a piece of plastic wrap sprayed with Pam to press the mixture into the pan. (take the plastic away before baking, of course)

After they were cool and cut (this was tough so use a sharp knife and be careful), I put the bars into snack sized bags so they would be ready for lunch boxes or to throw into my purse on the way out the door.
I'm looking forward to trying different flavor combinations using this recipe. I think dried cranberries and pecans would be great. You could really add just about anything in place of the chocolate chips as long as they were small enough... cinnamon chips, raisins, walnuts, dried blueberries, candied ginger, the possibilities are endless.

Chicken Enchiladas

This is a great way to use leftover chicken. It's also a great recipe to assemble ahead of time and bake when you need it. I made these enchiladas at nap time one day because our evening was going to be really busy. Homemade enchiladas sure beats fast food on a busy night. This picture really doesn't do it justice. Jon said this meal was "@#%&* Awesome!!" (very quietly so the kids didn't hear). Chicken Enchiladas

2-3 cups shredded chicken
1 1/2 cups corn (I used frozen without defrosting) (optional, leave out if you don't like corn)
salt
~10 flour tortillas
1 recipe of Enchilada sauce (below)
Cheese (optional for adding to the top before baking)

Enchilada Sauce
1 medium onion (diced small)
1/2 can tomato paste
1 8 oz. can no salt added tomato sauce
1 cup water
1 Tbsp. sugar
1 Tbsp. Chili powder (add more if you like spicy foods)
2 tsp. cumin
1 tsp. salt
1/2 tsp. pepper
**If you like spicy foods, add cayenne pepper or Tabasco sauce. This makes a mild sauce since I'm a big wimp.**

In a medium sauce pan, saute onion in olive oil or butter until tender and translucent. Add all other ingredients and stir until well combined. Cook on medium for about 15 minutes stirring frequently.


You'll need a 9x13 baking dish lightly sprayed with Pam. In a medium bowl, mix together chicken, corn, and a sprinkle of salt (more or less depending if your chicken is already seasoned).

Take a tortilla and dip both sides into the enchilada sauce. Lay the tortilla on a plate and place a bit of filling on the tortilla. Roll the sides of the tortilla into the center and overlap as much a possible. Lay the filled tortilla with the open side facing down in the pan. Continue until you run out of filling.

I had a few extra corn kernels that I sprinkled on top.


Pour the rest of the enchilada sauce over the top (and top with cheese if you like) and bake at 350 for about 25 minutes.
These were just as good as leftovers the next day.

Just A Few Apples.....

Saturday morning, we drove up to Ararat, VA to visit Windy Hill Orchards. It was an almost chilly 70* at 9am and a perfectly clear day. It was a beautiful orchard in the hills. I picked Windy Hill because they use a low-spray approach and integrated pest management. This means fewer pesticides are used and therefore the apples are healthier for us to eat. The You-Pick apples are only $10 a bushel so it's quite a deal. We had the orchard to ourselves most of the time. I guess not many people think to go apple picking at 9am on a Saturday morning.
Apple picking makes Charlotte go a little nuts.....


Maybe it was the fresh air and sunshine....


The kids thought the long-handled picker was a lot of fun.


Jon took this amazing picture. I love when he thinks out of the box and takes such imaginative pictures.


After he took a few photos, Jon put on the apple bag and got to work. He's quite a fast apple picker.


Evan got bored with picking and decided to make his own game with the bushel boxes.


Windy Hill had so many apple varieties. It was hard to keep them all straight.


Look at this gorgeous Red Delicious apple! I shined it up on my shirt.


Most of the trees were loaded with fruit.


This was the biggest apple I had ever seen. I'm not sure if you can tell but this apple is bigger then a softball.


Whew.... after almost 2 hours, we had 6 bushels of apples to take home with us plus a gallon of apple cider for the freezer. We got 2 bushels of Stayman, 2 bushels of Granny Smith, and 2 bushels of Red Delicious. With the price of $10 a bushel, I figured the more apples, the better!


Now comes the work. I'm storing the 2 bushels of Granny Smiths and 1 bushel of Stayman in the back of my mom's garage where it stays nice and cool. I'll bake with those apples throughout the fall and winter. The other 3 bushels will be made into applesauce and apple butter.


It was a beautiful, fun morning!

Raisin Newtons

During my visit to my sister's house in early August, we made raisin newtons (a take on fig newtons but without the fig). They were fantastic and much better then any newton I've ever had! I'll definitely be making these again soon.


I found the recipe on the Chickens In The Road blog. If you click on the link, you can read the background of this recipe and more thorough step-by-step instructions.

Raisin Newtons

Dough:

4 eggs

3 1/2 cups brown sugar

1 tsp. salt

1 Tbsp. baking soda

1 Tbsp. cream of tartar

6 cups of flour (though you may need a tiny bit more if your dough is too soft.)

7/8 cup melted lard (you could veg. oil or shortening if you don't have lard)

Mix all ingredients in a large bowl and mix/knead until the dough comes together. Our dough ended up being on the soft side and was a little hard to work with because of that. Next time I'll add flour until our dough is firm but not dry.

Wrap dough in plastic wrap and put it in the fridge for a couple hours.

Filling:

4 cups raisins

2 cup water

1 cup sugar

2 Tbsp. cornstarch

**This recipe is doubled. You won't have enough filling if you only make a single batch as the original recipe states**

Put raisins and water in a blender or food processor in batches. Blend or process until raisins are in small pieces depending on how chunky or smooth you want your filling.

In a saucepan, combine all filling ingredients and cook, stirring constantly, until the filling is thick (this took a while).

Transfer the filling to a bowl and put in the fridge until cool.

To make the cookies, divide the dough into four equal pieces. Roll a section of dough out thinly (about 1/8" or so) on a floured surface into long, narrow rectangles. Cut this piece in half length-wise with a pizza cutter. Spread filling down the center of each strip. You don't' need much filling. Fold the dough over, crimping to seal. Place rolls seam-side down on a lightly greased baking sheet and press a rolling pin over the strips to slightly flatten the tops. (we didn't have to do this because our dough was so soft). Put plenty of space between each roll since they will spread while they bake.

Bake at 350* for about 15 minutes or until they're golden brown. After taking the cookies out of the oven, while still warm, slice the rolls into small bars about 2 inches wide and let them finish cooling on a wire rack.

These cookies took a little while to make but they were worth it. It made a ton of cookies though I think you could half the recipe without any problem.
These bars/cookies were a little crispy around the edges, softer in the middle, slightly tart from the raisins but the dough is plenty sweet. I just might have to make these again this weekend. They'll definitely last us all of next week for lunch boxes and mid morning snacks.... as long as I can keep my hand out of the container of them!