Showing posts with label sewing. Show all posts

Saad's Kameez, plus three!

Asalamu Alaikum,

Usually I sew clothes just for my niece, as most of the extra cloth that I have in my fabric stash is from ladies suits. A couple months ago though, one of my sister in laws was cleaning out a closet and found a piece of cloth that was supposed to be for a man's shalwar kameez(about 7 meters, some sort of blend) and as no one was going to use it she gave it to me to experiment on.

I ended up making a little kameez for Saad, and then three more, one for each of my nephews!
Cute Little Man, all ready for Jummah(Friday prayers) with daddy!


I still need a bit more practice, as I had a couple small issues while working on it but they all turned out well for a first attempt.

Thumbs up, mama!


I have been doing more sewing than knitting or crochet lately, due to the heat I can only do the knitting at night before bed when we turn on the AC. I do have a couple of knit/crochet WIPs to post and lots more sewing too, inshAllah I'll be posting more in a day or two.

Sewing Sarubobo!

Asalamu alaikum,

I saw this over on Umm Aaminah's blog, and I just had to make it. The tutorial is from a blog she follows, Mairuru. So, a big thank you to Umm Aaminah, for the link and finding such a cute blog!


So first I made the orange one. It was so cute and Saad liked it so much that I made another. Of course then I had to make clothes for them, so they got little shirts and hats.
Hanging out on the roof.


After I made the first two I decided to make a mini one as a mobile charm.
Little cutie! Those are a five rupee coin, and a one dirham coin, they are both the size of a quarter.


His measurement before sewing was 2cm by 3cm(3x4 including seam allowance), with a 2 cm head(3cm with allowance).

I really like this little project and will probably make more as my niece saw them the other day and loved them.

Gathered Belt Shalwar w/Simple Leg-Part 2

Asalam Alaikum,

At the end of part one the main legs of our shalwar were finished, now we will be sewing the belt piece and attaching it to the legs, and finishing up our shalwar.

Step 1

Take the two pieces of you belt and sew a half inch seam, this is the center back seam. If you were able to cut one long piece for the belt then you can just skip this step.

Step 2
Make sure your leg pieces are right side out, with the right sides facing place one end of the belt half an inch to the left of the center seam and pin. The half inch is for the center front seam so you will start sewing on the center line of the legs not the exact edge of the belt.

See the extra half inch? Pin the belt in place starting half an inch in from the edge.
Step 3
Working your way around pin the belt in place every couple of inches.

Step 4
When you get close to the center back seam of the belt you will see that it does not match to the center seam of the legs. You will now need to make one or more knife pleats on either side of the center seam to make the center of the belt match the center of the legs. Here is a tutorial on making knife pleats, they actually measure but usually I just kind of eyeball it.
With the belt facing down, I pinch the excess fabric of the leg and form my pleats.
After pinching lay the excess flat and pin in place.
On the inside the pleats will face towards the seam, on the outside the pleats should face outwards, away from the seam. Remember to make the same number and same size of pleats on either side of the seam. Continue pinning the belt in place all the way around until you get to the center front seam again. You should have about a half inch extra on this side also.
Step 5
Starting at point A, sew around the top, sewing the belt to the legs until you get almost back to were you started at point B.
Step 6
Now you will sew up the center front seam of the belt piece. Matching up points A and B, and making sure the leg pieces do not get caught in the seam, sew from just above points A and B to point C, stop and turn around sew back for one inch to secure the seam. the distance from point C to the top of the belt should be 1.5 inches. This will be the opening for the drawstring.

Step 7
On the wrong side fold the edges of the center front seam away from the seam, and sew a line of stitches down one side across the bottom and up the other side.


Step 8
Starting from the center front seam, one quarter inch up from the seam that attaches the belt to the legs, sew a line of stitching to keep the extra cloth in the seam facing upwards. You should catch the seam that you made when attaching the belt to the legs.


Step 9
Now you will sew the drawstring casing. Starting at the center front where you made the opening, on the wrong side of the cloth, fold the top down half an inch, and then fold it down one inch, and sew along the very bottom edge to form the casing.

Step 10
Line up the inside seams, at the bottom of each foot opening mark out from the fold 7 inches.

Step 11
On the center crotch seam mark up from the bottom half an inch.
Step 12
Draw a connecting line from the mark on one foot(point A) up to the center mark(point B), and then back down to the other leg(point C).

Step 13
Starting one inch away from point A sew down to the bottom of the leg and then turn and sew up to point B(center crotch seam), and then down to point C. When you get to the bottom of the second leg, turn and sew back up one inch, sewing back over the stitches at each of the foot openings reinforces them.
Your gathered belt shalwar with a simple leg is now finished, and showed look something like this-
If you see a mistake in this tutorial or need more explanations feel free to leave a comment and inshAllah, I'll get back to you as soon as possible.

Gathered Belt Shalwar w/Simple leg Part 1

Asalam Alaikum,

Here is part one of the simple leg belt shalwar tutorial. If you have any questions do leave a comment and I'll see what I can do to clarify.

Step 1-Measuring

To start you will need to figure out some measurements, if you have a shalwar that fits you then you can measure that. If you do not have a shalwar, then you need to do a bit of math. Measure from where you want your waist band to fall to just below your ankle. Take that number and subtract 7 for the belt, the remainder is your desired leg length. To the belt you need to add 2 inches of height, 1.5 for the drawstring casing and .5 for the seam attaching it to the legs, so the total height of the cutting for the belt is 9 inches. You also need to add 2 inches to your desired leg length, .5 for the seam and 1.5 inches for the hem at the foot. So for example if your measurement for the total height of your shalwar was 38, that would be a belt of 7 inches(9 cutting) and a leg of 31(33 cutting). For the width of the belt you measure your hips at their widest and then add at least 6 inches for ease (although you can add more if you like), plus 1 inch for seams. The width of the main leg pieces should be as wide as possible, as the shalwar is supposed to be loose and flow-y.

Step 2
Fold your cloth in half the long way, and then width wise so that you have four corners in the bottom left side. Measure from the four corners down the desired length of your leg plus 2 inches. Do the same on the upper fold edge, and then mark a line straight from one point to the other. Cut and set aside the extra cloth, you will need it later to make the belt piece.

Step 3
On the selvage side make one mark at the half-way point.

Step 4
At the bottom of the cloth, measure out from the fold side for the foot opening. The average size would be 7 inches, but if you prefer a wider or narrower opening then make the mark more or less than 7 inches out.

Step 5
Now make a line connecting the half-way mark and the foot opening mark.
Cut the smaller pieces.
Step 6
Rotate the pieces so that they line up against the top of the main leg piece.

Step 7
On the outer point of the extra pieces mark one line so that the outer edge is nine inches, cut and discard the excess cloth.


Step 8
From the extra cloth that was left after cutting the leg, you will need to cut your belt pieces. If you can cut one long piece that is good, but normally I have to cut two rectangles and make one seam at the back. The two rectangles should be 9 inches tall by the width you took in step one.


After all your cutting you should have the following pieces-


Step 9
Now take the inner leg pieces and match them to the main leg pieces with right sides facing and sew a half inch seam. Each of the two main leg pieces should now look like this-

Step 10
Take the interfacing and center it on the wrong side of the cloth at the bottom foot opening one half inch up from the bottom.

Step 11
Fold up the half inch of cloth and sew one line to hold the interfacing in place.

Step 12
Now fold the interfacing up one inch. Sew at least one line at the top of the fold, and one line at the bottom, you can leave it like this, but usually more lines are added between, sometimes up to nine or ten parallel lines.

Step 13
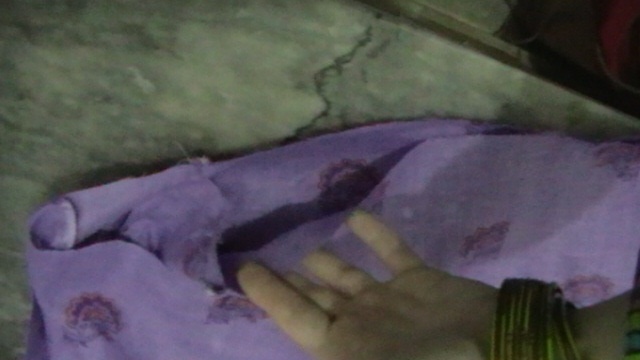
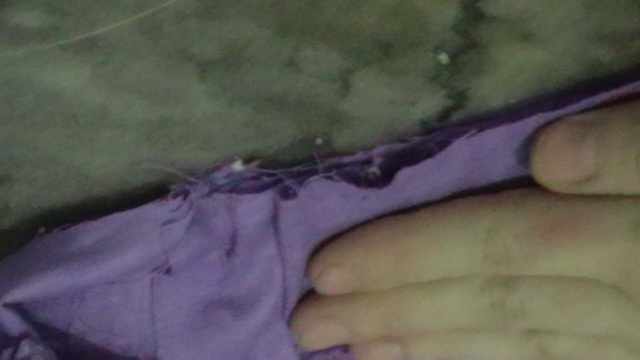
Match both of the leg pieces with right sides facing, and sew a half inch seam on one side of the extra pieces. This is the center front crotch seam.

Step 14
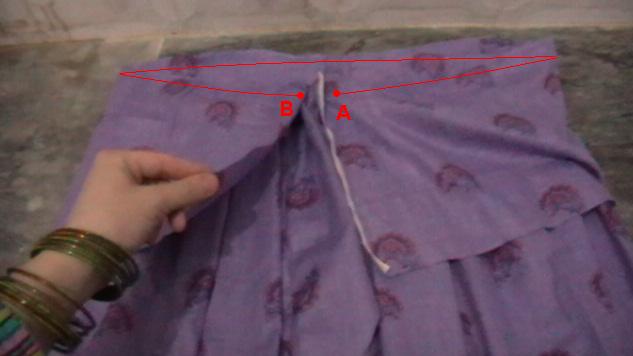
Thread a hand sewing needle with at least 20 inches of thread, and knot the end. Find the center of each of the main leg pieces and mark.

Run a line of roughly half inch stitches from one mark to the other. The above diagram shows the main leg pieces and your line of stitches should go from point A to point B.

Step 15
Draw your thread up so that the length is about 10 inches, and then make a knot to secure the gathers. You want the center part of the leg(points A and B) to line up roughly over your hips so that the center line runs straight down the front of your leg and the inner seam is at the back.
Step 16
While pressing down on the gathered area, run a line of machine stitches across it to secure them in place. Do not allow the machine to push the gathered part to one side, It should stay even all the way across.
You can now take out the line of hand stitching if you like.
Step 17
Match the back of the leg pieces and sew a half inch seam. This is the center back crotch seam.
End of Part one, for the rest please see part two of the tutorial.

If you see a mistake in this tutorial or need more explanations feel free to leave a comment and inshAllah, I'll get back to you as soon as possible.